10KK KOROTON MAKSUAIKA - Yksityisasiakkaille 10kk koroton maksuaika Svealta YLI 1000€ tilauksiin ! KATSO LISÄÄ
 LUE LISÄÄ
10KK KOROTON MAKSUAIKA - Yksityisasiakkaille 10kk koroton maksuaika Svealta YLI 1000€ tilauksiin ! KATSO LISÄÄ
LUE LISÄÄ
 Kirjaudu sisään
The PLH3D-CNC Universal Laser Adapter designed for all types of CNC/3DP machines. Easy and quick connection between laser head and CNC controller. It accepts all CNC control signals. Everything you need is included!
Many types of CNC machines and 3D printers with different control voltage standards and levels available on the market can be used to control the PLH3D laser head. The PLH3D-CNC Adapter converts these various signals to a standard compatible with the PLH3D head. The PLH3D-CNC Adapter contains widely used, industry-standard screw connectors. A dedicated, low-noise, desktop power supply unit (PSU) assures compatibility and reliability as well as eliminates problems caused by using third-party power supplies. The general status (power, armed, laser working) may be checked at a glance by watching three LEDs.
The laser head may be checked by generating a short laser pulse at maximum power.
The key function of the PLH3D-CNC Adapter is to “arm” and “disarm” the laser head. Arming means turning the head power supply on; the armed head is then able to generate a laser beam. Disarming (turning the head power supply off) brings the laser head in a safe state where generating a laser beam is impossible.
The built-in safety prevents misuse and unexpected behavior in case of an emergency. The key switch protects the laser head against arming by children and other unauthorized people. Arming the laser head is always done manually by the user, by pressing a button. Special circuitry prevents arming in the event of internal electrical malfunctions. The laser head is automatically disarmed in case of emergencies such as a loss of the mains supply (grid power), PSU failure, breakage or disconnection of the laser head cable. After disarming, the system remains in a safe state and rearming always requires manually pressing the button by the user.
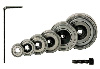
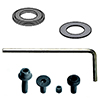
Parts included in the Universal PLH3D-CNC Adapter Kit are listed above, in the section “Individual Kit Parts”
Seven types of wires are included in this set to guarantee connection with your CNC machine or 3D printer. Simply choose the one which fits your machine and follow the connection instructions!
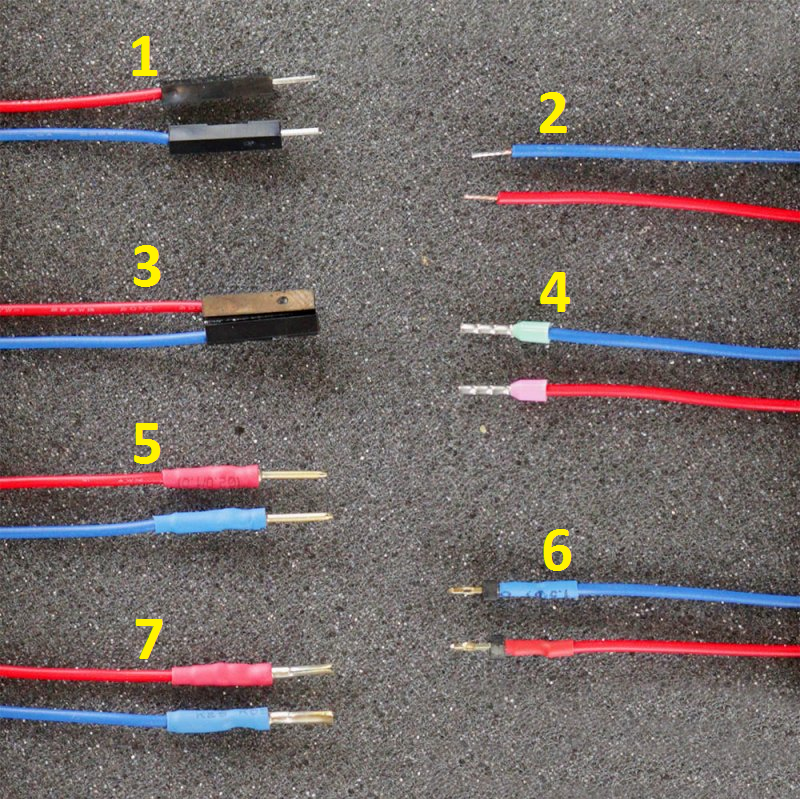
1. Male gold pin header connectors connect to female gold pin connectors. First, find the two slots responsible for signal modulation: analog output (0-5 V or 0-10 V) or TTL/PWM output, and GND. Then simply plug the blue wire to GND and the red wire to the signal which is used by the machine to operate the laser. Use the terminal block electric strip to connect the blue and red wires with the labeled wires of the Universal PLH3D-CNC Adapter.
2. Tinned copper wires connect to SMD or THT components of the CNC controller. First, find the two vias/holes or ports on the PCB responsible for signal modulation: analog output (0-5 V or 0-10 V) or TTL/PWM output, and GND. Then simply solder the wires to the part of the PCB board of the controller, the blue wire to the GND signal and the red wire to the signal which is used by the machine to operate the laser. Use the terminal block electric strip to connect the blue and red wires with labeled wires of the Universal PLH3D-CNC Adapter.
3. Female gold pin header connectors connect to male gold pin connectors. First, find the two pins responsible for signal modulation: analog output (0-5 V or 0-10 V) or TTL/PWM output, and GND. Then simply plug the blue wire to the GND and red wire to the signal which is used by the machine to operate the laser. Use the terminal block electric strip to connect the blue and red wires with labeled wires of the Universal PLH3D-CNC Adapter.
4. Insulated wire end sleeves connect to terminal blocks and screw connectors. First, find the two terminals of a connector responsible for signal modulation: analog output (0-5 V or 0-10 V) or TTL/PWM output, and GND. Then simply insert the blue wire to the GND terminal and the red wire to the modulation signal terminal which is used by the machine to operate the laser and tighten the screws. Use the terminal block electric strip to connect the blue and red wires with labeled wires of the Universal PLH3D-CNC Adapter.
5. Male D-SUB connectors connect to any kind of female D-SUB connectors. First, find the two slots responsible for signal modulation: analog output (0-5 V or 0-10 V) or TTL/PWM output, and GND. Then simply plug the blue wire to the GND and the red wire to the signal which is used by the machine to operate the laser. Use the terminal block electric strip to connect the blue and red wires with labeled wires of the Universal PLH3D-CNC Adapter.
6. Press fit male gold pin header connectors connect to male gold pin connectors. First, find the two vias/holes in the PCB responsible for signal modulation: analog output (0-5 V or 0-10 V) or TTL/PWM output, and GND. Then simply press the connector into the via/hole in the PCB board of the controller, the blue wire to the GND and the red wire to the signal which is used by the machine to operate the laser. Use the terminal block electric strip to connect the blue and red wires with labeled wires of the Universal PLH3D-CNC Adapter.
7. Female D-SUB connectors connect to male D-SUB connectors, and can also be used to connect to other types of connectors which use male pins. First, find the two pins responsible for signal modulation: analog output (0-5 V or 0-10 V) or TTL/PWM output, and GND. Then simply plug the blue wire to the GND and the red wire to the signal which is used by the machine to operate the laser. Use the terminal block electric strip to connect the blue and red wires with labeled wires of the Universal PLH3D-CNC Adapter.
 Saat 32.62 alennuspistettä
Laskelmat perustuu Grenke-leasing hinnastoon, joka ei sisällä vakuutusta. Vakuutus on pakollinen ja asiakas voi hankkia joko oman vakuutuksen tai ottaa sen samalla sopimuksella. Leasing-rahoitus myönnetään vain yrityksille, joilla voimassa oleva Y-tunnus.
Leasingaika 12-72 kk.
Leasinghinnat alv 0.
Mahdollisuus lunastaa lopussa omaksi loppulunastushinnalla, joka näkyy tuotteen kohdalla ja yhteenvedossa. Loppulunastushinta on minimissään 70€ alv 0.
Lähetettyäsi tilauksen leasing rahoituksella, saat 1-2 päivän sisällä sähköpostissa sopimukset sähköisesti allekirjoitettavaksi.
Mikäli haluat käyttää omaa vakuutusta, leasing-yhtiö tarvitsee vakuutustodistuksen, josta käy ilmi seuraavat asiat:
100% Suomalainen verkkokauppa
Asiantunteva asiakaspalvelu
Nopeat toimitukset
Suuri valikoima suoraan varastosta
Ei välikäsiä - säästä hinnassa


 In English
 På Svenska


 Lisää ostoskoriin
 Lisää toivelistalle