10KK KOROTON MAKSUAIKA - Yksityisasiakkaille 10kk koroton maksuaika Svealta YLI 1000€ tilauksiin ! KATSO LISÄÄ
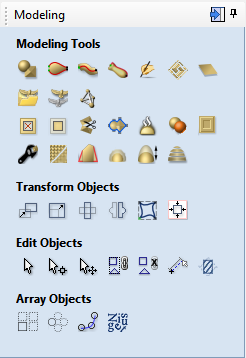
Aspire is built on the same platform as Vectric's VCarve Pro software, sharing the intuitive interface and ease of use for production design and routing. In addition to the powerful drawing and production routing tools of VCarve Pro, Aspire also has tools to let you transform 2D sketches, photos, drawing and digital artwork into detailed 3D relief models and then to calculate 3D Roughing and Finishing toolpaths to accurately cut these shapes.
Create rotary projects and visualize your job in a wrapped environment.
Create two sided jobs and visualise them in the same session
Allows you to define a component level so that it mirrors all its components.
Takes a profile and turns it, like a lathe to create a rounded symmetrical component
Two-Sided Machining
This adds the ability to create double-sided projects in the same session. It avoids the need to have 2 sessions, one for each side.
Job & Material Setup
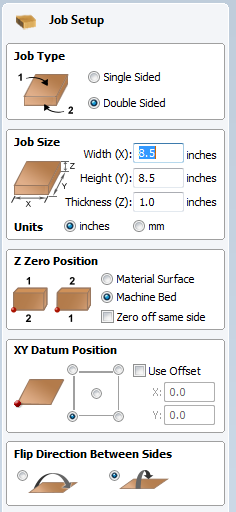
In the Job Setup dialog, you can pick whether you want to create a single-sided, double-sided or a rotary job. You can change that, retrospectively.
Define how you want to flip the material for double-sided projects from the Job Setup dialog. This influences the positioning of the vectors and models so that geometry on each side is created in the appropriate positions relative to the opposite side.
Multi-Sided View
You can view the opposite side’s geometry using the keyboard shortcut ‘=’, or through the ‘View’ menu.
In the 2D view, you will see the opposite side’s vectors as if you were looking at them through the material block.>
In the 3D view, you will see the entire merged model as if it was simulated.
Importing STL Model
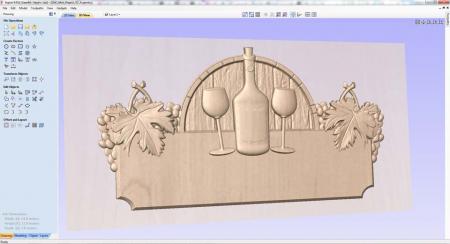
When importing an STL model (with the ‘Import both Sides’ option enabled) into a double-sided project, each side of the model will go onto a side.
You can import the entire model on each side by sliding the slicing plane all the way to the bottom. This is useful when importing models which contain non-convex surfaces, such as, a plate.
Rotary Machining
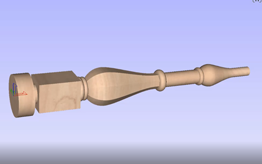
Enables the use of a rotary axis (also called a 4th axis or indexer). Where you can Create rotary projects and visualize your job in a wrapped environment, with the ability to create and simulate the toolpaths in an auto - wrapped simulation.
Job & Material Setup
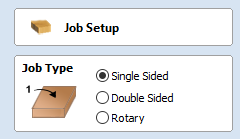
In the Job Setup dialog, you can pick whether you want to create a single-sided, double-sided job or a Rotary Job. You can change that, retrospectively. Define your cylinder dimensions, the orientation of the job, how the 2D view will be laid out, and which axis we're wrapping around.
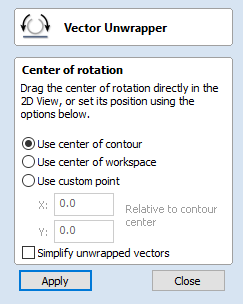
Vector Unwrapping
The Vector Unwrapper tool converts a vector into another vector suitable for using with the two-rail sweep tool to create rotary models from a desired cross section.
This is useful when rather than modeling a profile along the rotation axis, it is more intuitive to specify a desired cross section. The tool transforms a vector, representing a cross section, into a profile vector that can be subsequently used with Two Rail Sweep tool.
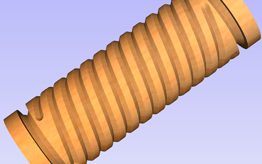
Simulating Spiral Toolpaths
In order to create a toolpath that wraps around blank multiple times, one can create a long vector at certain angle. Such a vector is an equivalent to the strip of fabric when it is unwrapped from the roll.
Although such a toolpath will exceed the 2D workspace of the rotary job, thanks to the wrapping process during both simulation and machining the toolpath will actually stay within material boundaries.
Model Import into Rotary Project
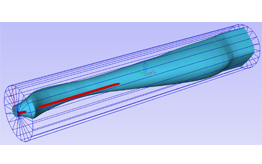
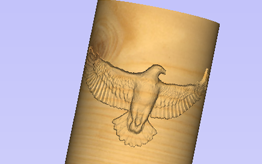
The software has the ability to import full 3D models from third party software for unwrapping in a Rotary Job, where you can position and orient the model in a rotary view.
Not only can you import full 3D models for unwrapping the software also allows for the importing of "Flat 3D" models (relief style models) that you can position and simulate before cutting.
Vector Shape Creation
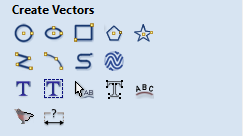
The software has a comprehensive set of drawing tools to let you easily create vectors from scratch or add to imported data. These include options for creating standard shapes (circle, elipse, rectangle, polygon and star) along with line, curve and arc drawing tools. There is also a powerful tool to create vector textures for panels and backgrounds. These tools can be controlled using typed input to create exact sized objects or can be used dynamically with the mouse to sketch your artwork. The tools also take advantage of the 'snapping' to let you use points on existing objects to 'snap' onto when you are drawing vectors.
Picture Editing & Cropping
With the ability import bitmaps into the software, you can further edit imported images using the Edit Picture tool, this allows you to adjust the visual properties of a selected bitmap, enabling you to adjust the contrast, brightness and gamma of any selected image.
Borders of different sizes and radii can also be added to bitmaps for aesthetic purposes. Bitmaps can also be made black and white. The software also has the ability to crop images to any given vector allowing you to remove parts of the image you are not interested in.
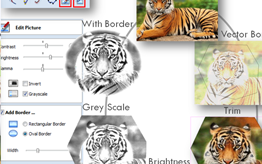
Image Tracing (Vectorization)
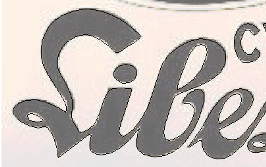
Image Tracing also known as Vectorization allows you to take an imported image such as a scanned drawing, graphic design or photo and to convert colors in that to vector outlines. These outlines can then be used as part of your design to create toolpaths or to generate 3D shapes using the modeling tools. The software will import many file formats including jpeg, bitmap, gif, png, tif, it will also extract images from a PDF file.
Advanced Text Tools
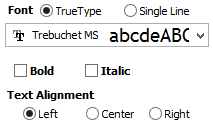
The Advanced Text Tools let you access True Type or Open Type fonts on your PC to create text outlines for your design. In addition, the software comes with a selection of specialist Single Stroke / Stick Engraving Fonts for efficient machining when making things like badges or small signs.
When creating text you are able tosee live feedback of the text that you create and edit. The text can be controlled using automatic sizing and layout options.
There are also editing tools for Fitting Text to a Curve and interactive text arcing and spacing (kerning) where the text maintains formatting, allowing you to easily make edits after the text has been created.
Import 2D data (DXF, DWG, EPS, AI, SKP, SVG etc. )
Data can be imported from a huge range of other design programs using a variety of industry standard file formats. These include DXF, EPS, AI, SVG and SKP (SketchUp) as well as PDF files. Once imported, the program has a wide range of tools to make working with this data as efficient as possible.
A very important set of tools are those used to identify duplicate vectors and identify and rejoin open vectors. These tools can save an great deal of time when working with poor quality data to get it ready to machine.
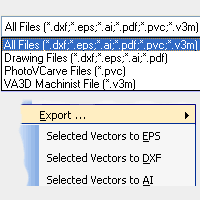
As well as importing vectors from other programs the software also offers the ability to export your data in either DXF, EPS or AI file formats. This feature is very important if you need to share data with a customer in order that they can use it to plan a layout or installation.
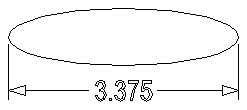
Basic Dimensioning
The Dimensioning tools allows you to create a variety of different types of measurements on your drawing. These can be oriented in any direction or fixed horizontally or vertically. There are also options to add angular and arc dimensions. You can control the text height, font number of decimal places and position for each one. Dimensions can be snapped to vectors, guidelines and the corners or mid-points of each side of your work area.
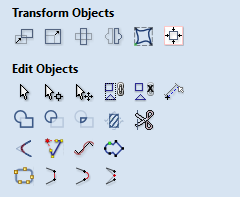
Vector Transform & Editing
Whether your design vectors have been created in the software or imported you have a large choice of editing options to prepare your part for toolpath creation or modeling. Vectors can be easily scaled, moved, mirrored, distorted, grouped, welded, trimmed, filleted, extended, offset, smoothed and joined together. As with the drawing tools you either have precise control over the editing values adjust the vectors very accuratley or can use the mouse to dynamically make adjustments until your layout looks correct.
Vector Layout
In addition to the editing tools the software also has tools to let you layout parts either in a rectangular array to create a grid of objects or in a circular array to create symmetrical layouts around a center point. When laying out a grid you can adjust mirroring options and shift alternate rows and columns to make more complex layout patterns.
Vector shapes can also be pasted along the path of another vector by specifying the distance between each copy or just fitting a specific number on the guiding object.
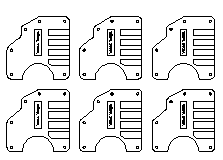
True Shape Nesting
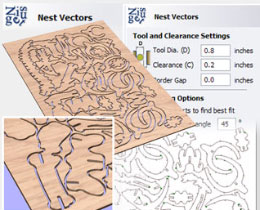
True Shape Nesting lets you automatically arrange and fit vector shapes into your material size or user definable area, to get optimal material usage and minimum wastage.
Part Nesting is perfect for Sign and Cabinet makers who need to minimize material wastage and cut as many parts – letters & cabinet doors / panels – as possible from sheet materials.
Reduce Material Costs = Increased Profits
The nesting routine places vector shapes as close to each other as possible ensuring a sufficient gap to allow the parts to be cut out correctly. The nesting includes options to control part direction with regard to things like material grain or machine orientation.
Layer Management
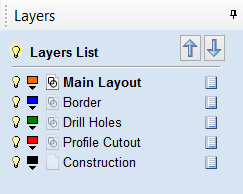
The Layers are a very efficient way to keep your 2D data organized, one of the main uses is to allow you to temporarily hide data you were not currently working with. Layers could also be used to group vectors you might be using to model related shapes in a 3D design to make it simpler to work on a small part at a time.
The ability to associate toolpaths with specific layers and types of data means you can create Toolpath Templates which can be assigned to other parts that share the same layer structure. This is particularly powerful for applications like Cabinet Making where different designs can be automatically machined once a template has been set-up.
Rulers, Snap Grid and Guidelines
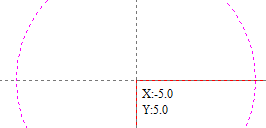
Rulers, Snap Grid and Guidelines help to make vector drawing and 3D part layout much simpler. These options can be switched on / off as required. When combined with Snapping options that automatically detect and snap the cursor to key regions on a design these tools make it easy to create very accurate part.
Trim Objects to a Vector Boundary
The trim tool allows you to simultaneously trim all the objects inside or outside of a selected area. This makes it very easy and quick to create textured areas or patterns within a specific boundary.
Create Vector Texture
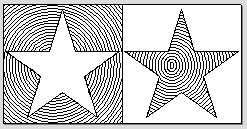
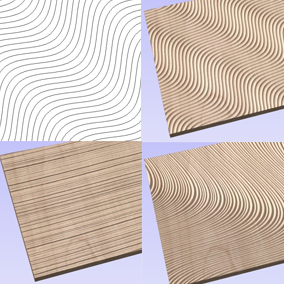
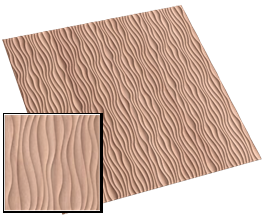
Repeating vector patterns can be quickly created using the Create Vector Texture tool. Its easy to modify the settings to create an infinite number of variations from regular wave patterns through to uneven natural looking grain lines.
These vectors can be machined using the Profile and Texture toolpaths to create decorative wavy texture panels along with wood-grain and sand-blast effects. These can also be projected onto a 3D surface to add even more variation.
Smart Snapping
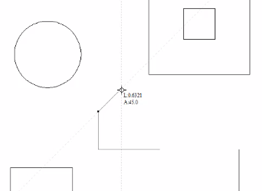
This allows you to snap to lines and extensions, which don’t necessarily exist as geometry. It reduces the need to create construction geometry, and would be helpful in aligning vectors or nodes.
Quick Keys
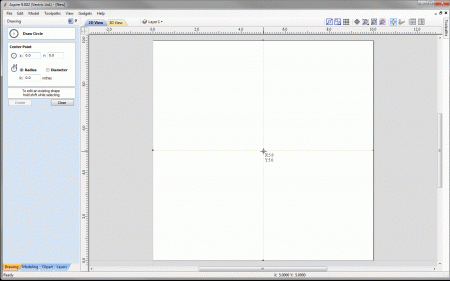
This allows you to add more precision to your shape creation and editing process more easily by allowing typed values while creating geometry. This is supported for creation of circles, ellipses, rectangles, polygons, stars, polylines and when in editing nodes or transforming vectors.
For example, while dragging to create a circle, you could type ‘3R’ to create the circle with a radius of 3. Or, also while dragging, you could type ‘3D’ to create one with a diameter of 3.
Vector Validator
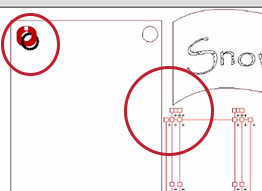
The Vector Validator is intended to help find issues with contours after file imports that are stopping tool-path creation such as overlapping contours or intersections. It also indicates zero-length spans.
Create Shapes from Vector Outlines
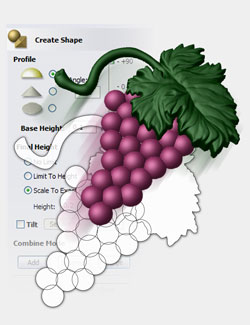
The Create Shape modeling function Instantly adds 3D shape to a closed vector outline based on either a Curved, Angular or Planar (flat) profile. These shapes can be controlled by adjusting angle and height values.
Your 3D design updates instantly showing you what your model looks like while experimenting with different shapes, heights, tilts, fades and combine modes. This allows you to quickly define the shape you actually want.
Once generated the shape is added to the Component Tree and can be further edited and combined with other shapes to make your finished 3D part.
Two Rail Sweep
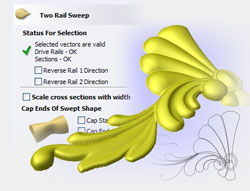
Sweep along two vector rails to model 3D shapes based on one or more cross section shapes. This powerful tool can be used to create accurate geometric shapes like borders or can be used to create flowing organic shapes such as a leaf or decorative flourish.
Options for this tool include:
Extrude and Weave
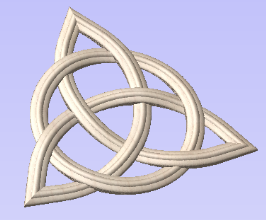
Extrude and Weave allows you to use one or more vectors as drive rails and extrude either vector cross sections or existing 3D components along them. In addition to the standard extrude the function has an option to automatically create a weaved effect where the drive rail/s overlap.
The tool includes many options to help you control the way the shape flows and the final result you get. The variety of 3D forms that can be created with this tool vary from simple linear extrusions all the way to extremely complex ornate woven shapes and it certainly qualifies as one of the most powerful tools in the program.
Create Texture Area
This feature lets you create a repeating pattern or texture. It requires a single "Tile" component and optionally one or more closed boundary vectors which define the region in which the tiling should take place.
The Create Texture Area form lets you specify the spacing and overlap of each tile, enter a "Shift" for every other row or column of your pattern and control the "Symmetry" or reflection of the tiles. This provides powerful control to make an incredible number of variations to your pattern and create some very interesting effects. The pattern dynamically updates as you make changes, you can even adjust the size and position of your original "Tile" at any time
40 models have been created specifically for use with this new tool and are supplied with the software as part of the included Clip Art. In addition to these pre-created models you can also create new components or edit existing ones to use with this function so the potential for creating architectural panels, sign backgrounds, decorative textures or any other applications are endless.
Interactive Sculpting & Blending
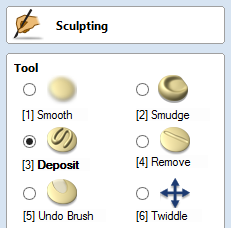
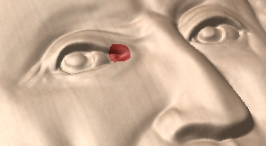
Aspires powerful 3D Sculpting tools provide total flexibility when modifying designs. Models can be manipulated like a piece of virtual clay to smooth out edges and discontinuities, as well as to add extra detail, all helping to create that authentic ‘hand carved’ look for your models. This function sets Aspire apart from typical computer modelers as this type of dynamic editing cannot be replicated using standard surface or solid CAD/CAM modeling programs
The Sculpting lets you interactively modify 3D designs using the sculpting tools with control over brush size and strength, plus options to,
The option to Preserve Transparency limits sculpting changes to only be on the 3D model surface and not 'bleed out' onto the surrounding flat plane.
The option to show the grayscale background allows you to see a grayscale image of the model shown on the sculpting screen. This means that you are better able to see how sculpting changes affect the whole model.
The Undo function allows the sculpted changes to gradually be returned back to the original state. Allowing changes to be undone on specific local regions without having to undo any changes made to the complete model.
The sculpting can be controlled using the mouse or even a pen tablet (such as a Wacom) and where applicable PC's that use a touch-screen.
Turn & Spin
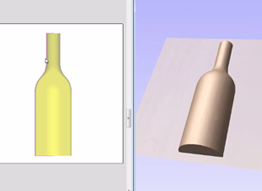
Create spun profiles easily using the Spin & Turn Modelling Tool.
The turn tool takes a profile and turns it, like a lathe or a potter’s wheel, to create a rounded symmetrical component. To use the tool you require only the profile that you want to turn. This profile should represent the outer boundary of the shape you wish to create.
3D Textures from Images
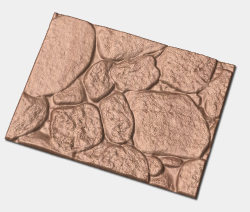
Import 2D (color and black & white) image files – BMP, JPG, TIF, GIF and instantly convert them to 3D component textures that can be applied onto or behind 3D models and machined as part of your project.
Aspire can be used to build an infinite variety of 3D textures from imported images. These textures can be combined with other 3D shapes in the design and can also be interactively edited to any size or height as well as being sculpted or smoothed to adjust their final look before toolpath creation.
This function can also be used to make high quality Lithophanes (back lit machined photos).
3D Component Editing
Many of the vector editing tools which can be used on 2D data in Aspire can also be used to edit 3D Components. Shapes can be easily scaled, moved, mirrored, distorted, grouped, trimmed and cropped. Aspire also allows you to smooth a 3D object or to add draft which creates angled walls on the part (good for vacuum forms). The software also has a tool to Z-slice a part to create separate models if your CNC size, tooling or material limits the depth of part you can cut.
3D View Component Manipulation
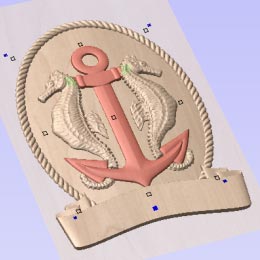
Many of the dynamic component editing tools can be accessed directly from the 3D View. This allows 3D objects to be moved, scaled and rotated. In addition how they combine with other shapes can be adjusted along with their height and evening adding a tilt or fade.
Editing the components in the 3D View makes it quick and easy to see the immediate effect of the changes to the Composite Model and so reduce the time it takes to create a 3D layout.
Mirror Mode Components
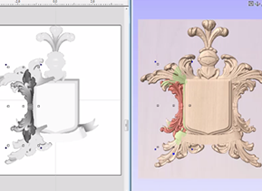
This feature allows you to define a component level so that it mirrors all of its components in a certain way, based on the mirror type. This allows you to build pleasing symmetrical arrangements with ease.
Offset Model
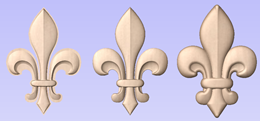
The Offset model tool creates a 3D offset of the composite model. This can be used to make the model larger or to reduce its size. One application for this is to create a wall thickness between the inside and outside of a press, mold or die to accomodate the material being formed.
3D Component Manager
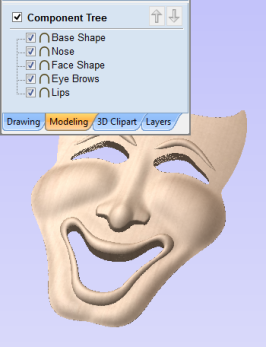
Aspire's unique ‘Component’ based modeling approach gives enormous flexibility when creating complex designs. The ability to work on small simple pieces makes it easier to build up the pieces you need to create a complex job. This also gives you the power to continue to edit individual parts of the design as you build it up. This approach is particularly useful if you need to make design changes based on customer feedback.
Using the component manager (Component Tree) individual 3D objects can be adjusted to change the way they interact with each other within a project. These can be further organized by the use of Levels to create sub-assemblies of shapes that first combine with each other before being added to the overall shape of the model.
As you make changes to a Component the 3D model will update to show you instantly the effects of your choices making it easy to iterate through different design options.
Import 3D Models & Clip Art (STL, OBJ, 3DM etc.)
Any model you create in Aspire can be saved as a piece of Clip Art for use in other projects.
Import 3D Mesh files created in other CAD software such as,
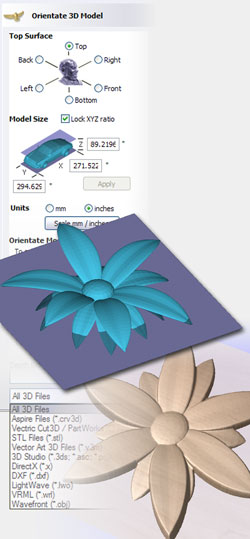
Interactively change the size and orientation of imported 3D models.
Interactively rotate 3D mesh files into the required orientation for adding to a design.
Instantly convert designs from raised models to recessed mold cavities.
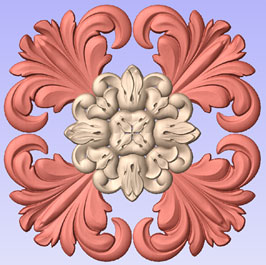
Easy to use interactive drag and drop, size, mirror, rotate and distortion tools allow 3D clipart designs and modeled components to be edited to instantly produce unlimited design variations.
Intelligent Clipart File Format - 3DClip
Aspire's special 3DCLIP file format lets you save one or more 3D Components as a model that retains the individual component elements used to create it. Rather than save several individual files to cover all the permutations, these allow you to export a single clipart file that preserves the structure of the components. The visibility of individual components can then be altered, even after the design has been imported into a new model. This is in effect is way of creating "Intelligent Clipart".
A Component, Component Group, Level or the Visible Composite Model can be exported from any session of Aspire to add to your library of clipart and then import and re-use all or part of in another project.
Clip Art Browser
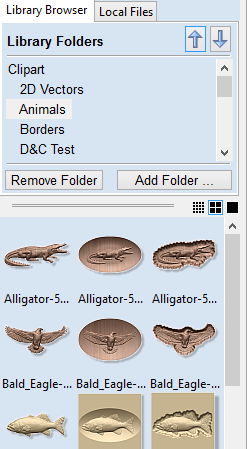
The Clipart tab provides quick and convenient access to Vectric files containing 3D components or 2D vector artwork. This allows you to easily re-use previously created shapes in new projects.
This tab includes the library browser that allows you to add folders containing 3D components into the software or you can use the local files option that allows you to quickly see the contents of several folders of 3D components in one place.
The clipart Tab also allows you to access the online clipart that comes free with the software, where the clipart can be downloaded directly from the running software (providing you have internet access). The software comes with previews of the clipart you're entitled to, and with internet access you can download the clipart straight into the software for ease of use, where you can download only the pieces you want within the software.
The software gives you the choice of whether to display just the contents of the current folder or up to 3 sub-folders as well making it easy to access many models at once.
You can "Drag & Drop" a thumbnail into the 2D or 3D View and the selected object will be imported at the location of the dropped thumbnail and added to the model's Component Tree.
The Clipart tab is a great way to browse and select from the Free Clip Art that is included with Aspire. In addition to the large number of files that are included with the software (see Free Clipart section below) Vectric also has a website that offers additional files for sale;
Design & Make
Design & Make has a library of over 2500 high-quality, CNC-ready dimensional clip art models.
You will find a selection of relief-style clipart pieces, mini projects, and collections to suit every CNC project need. These can be purchased, downloaded and carved as individual models or combined to make more complex designs.
Free 3D Clipart (worth over $5,000)
The Aspire installation disk includes a large variety of 2D and 3D Clip Art files that can be used as is, in your own projects or edited to create your own variations.
The files include a mix of formats. The 2D artwork (110 items) comes in CRV format which can be opened in VCarve Pro or Aspire. The majority of 3D files are V3M or 3DCLIP format some of which have individual Components saved in the file (see section on Intelligent Clip Art). For the panel, shields, weaves and some ribbons there are CRV3D files that include vectors so you can see how some of the files were created and easily edit and recreate versions of your own. There are also 40 files created specifically for use with the Create Texture Tile function.
Over 150 of the models are commercial quality pieces of 3D clipart from Vector Art 3D. Each one of these is presented in 3 different styles, raised, dished and recessed (so actually 450+ variants), retail cost to purchase just these files would be over $5,000 if bought from the Vector Art 3D website.
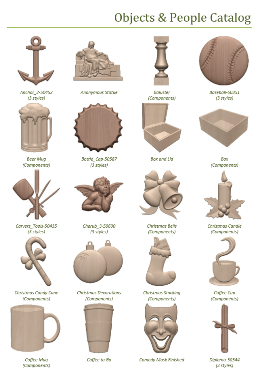
There are almost 700 different individual designs on the disk in a number of variants totalling over 1350 different files. You can read more about the specifics of the files and see a catalog of the models by clicking on the link below.
Material Setup
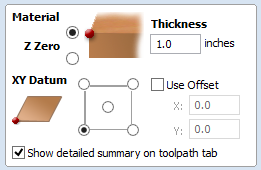
Referencing the software to how your CNC will be setup is one of the most important elements of the process. A summary of the Material Setup is displayed at the top of the Toolpath Tab allowing you to quickly check the settings before you start calculating toolpaths. Any of these values can be easily adjusted to change the tool reference for its X,Y or Z zero location, move the position of a model in the material, adjust the position where your machine starts from or specify distance to ensure the tool lifts above any clamping that is being used.
2D Production Profiling
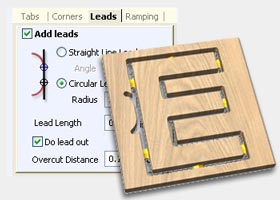
Using the profiling toolpath strategy, objects can be cut out quickly and efficiently. Simply select the vector shapes you wish to profile, select the tool from the tool database and the software will do the rest. The Profiling automatically offsets for the tool radius and sorts nested shapes to ensure that inner shapes such as the center of a letter 'O' are cut before the outer shape (so parts are not released from the material before they are cut). Full control of cut direction is offered along with either automatic or manual control of tool entry point for each shape.
Profile Machining includes production cutting options that ensure parts can be held in place and accurately machined with high quality edges and corner detail.
Cutouts can be done in multiple passes depending on the maximum cutting depth of the tool used and a positive or negative allowance can be specified to either 'under cut' or 'overcut' the shape if required. The number of passes on a cut can be edited very precisely to allow very thin final cuts or to individual add or remove particular cut depths.
A separate last pass allowance can be specified for the last pass in a profile toolpath. If this allowance is given, then all but the last pass will be over-cut by the specified allowance with the final pass being the only pass which cuts to the actual edge of the part. This can significantly improve the finish on the cut-edge.
The ability to specify that square corners are required is another powerful feature. This is often used when profiling with a V-Bit tool, where with a conventional toolpath the tool will 'roll' round a sharp external corner leaving a radius on the top of the chamfer created by the tool, with the 'square corners' option an angular chamfer will be created instead.
The Profile toolpath is probably the most important toolpath option available. It is used for some of the simplest and also the most complex things you may do with your CNC. The software has been structured to let you customize whether you just want simple options for quick cut-outs or whether you want to access more advanced features to control cutting on particular material. This allows both new and experienced users to decide how much information they need to be presented with when creating this frequently used function.

Fast and Efficient Pocketing – optimizes use of two tools
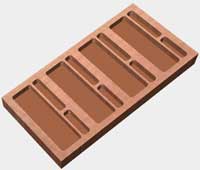
The Pocket toolpath makes machining the material away from inside a vector shape efficient and easy to achieve. Just select all the vectors defining the shapes you want to cut and the program will sort the vectors to identify islands automatically and offset the boundaries for the selected tool radius.
The 2D Pocketing Toolpath has the ability to control Pass Depths very precisely, either automatically based on the tool settings or where required the user can specify any combination of depths for a particular tool.
Either climb or conventional cutting directions can be specified in order to produce the best edge finish for your selection of material and cutter. The tool can also be ramped into the job to reduce cutter stress when entering the material.
Helical Arc Support
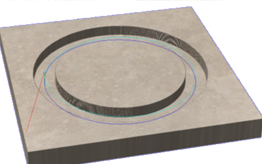
Output helical arcs in a way that your machine understands. Makes for smoother cuts and smaller file sizes.
Helical arcs are like regular arcs when viewed in 2D but where the start z and the end z differ. They are typically found in toolpaths where ramping occurs.
Drilling
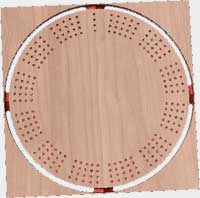
Whether you are drilling a single hole or hundreds, just select the vectors representing the holes and the software will drill the center of each vector to the specified depth. The grouping feature makes it easy to associate all vectors for a particular toolpath strategy together so only one needs to be selected. The tool database includes a dedicated drill tool type so that the true tool geometry can be seen in the toolpath previews.
As well as a single Z plunge you also have the option to activate Peck Drilling, which drills to a specified depth, retracts the tool to clear the chips, drills down to the next step, retracts the tool and so on until the required finish depth is reached.
Precision V-Carving
V-Carving uses a constant angled cutter that's moved at flowing variable depth to create a 3D carved effect on the job, similar to the way a craftsman would work by hand. The software automatically calculates a path defined by the combination of the angle of the tool specified and the width and shape of the vectors being machined.
The extremely fast and robust Vectric VCarving engine handles complex designs with ease providing both fast calculation speed and robust handling of imperfect data.
As well as 'simple' VCarving, the software supports many advanced VCarving strategies, such as 'Flat Bottomed' v-carving, optionally using a second flat bottom tool to optimally clear out the flat areas.
The option to Use Vector Start Points lets you choose the positions the tool will enter the material. For some applications this can help reduce the load and as such potential marking of the finished part, created by tool vibration when plunging into a deep area.
Another advanced capability is the support for v-carving areas wider than the tool by making multiple clearance passes to achieve the required depth. This is done automatically by the software when the carved area is deeper than the maximum cutting depth of the tool.

Raised Prism Machining
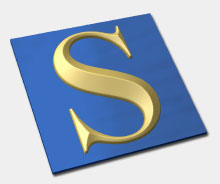
The Raised Prism machining strategy is prefect for cutting high quality raised lettering and shapes on signs for restaurants, hotels and bars etc. that look hand-made.
Moulding Toolpath
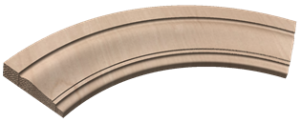
This function generates an efficient and smooth toolpath to cut 3D shapes such as mouldings, arches and frames that have a constant cross-section. The shape is specified by selecting two vectors; the first will represent the Drive Curve of the shape and the second defines the Cross Section that will in effect be extruded along the Drive Curve to create the swept shape when machined.
The Moulding Toolpath function allows you to specify two tools, one to in effect "Rough" out the majority of material with a larger tool and then the other to do the "Finishing".
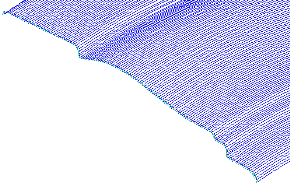
The Moulding Toolpath has some clever options to further improve finish and efficiency. For the "Finish" tool you can opt to "Vary Stepover", this can be used to improve finish on shapes that have a lot of steep angles or curves on the cross-section. For the "Rough" tool you can choose to have it pre-finish any flat (horizontal) regions on the cross section, which are common on a lot of Moulding shapes. Using this option also allows you to avoid creating a "Finish" toolpath in those flat areas further increasing time-savings when machining.
Fluting Toolpaths - Ramp In / Out
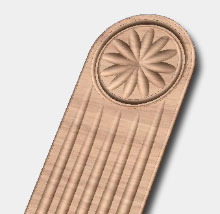
Fluting is a special toolpath type for cutting tapered grooves often known as ‘Flutes’ by ramping the cutter into and out of the material. When using this toolpath the software drives the tool along the center of the vector giving you control over the way the tool ramps into the start and end of each selected object. This has many interesting applications outside of just the standard uses you would expect for this type of operation.
Perfect for:
Efficient Texture Toolpath
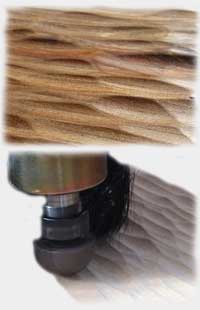
Textured panels are often specified by interior designers and architects and textures are also a very useful option for creating backgrounds on dimensional signs. Vectric has a unique approach to generate unique 'hand carved' looking textures which still machine extremely efficiently.
Once you specify a tool (typically a pointed or round profile) then you have various settings you can set to create the characteristics of your texture toolpath. To give these textures a more natural and less machine made look you can set different levels of randomness. The toolpath will replicate the same type of move that would be made by someone using a chisel to carve overlapping strokes into the material. Creating this as a toolpath move (rather than as a 3D model) will minimize the hand-finishing and also the machining time required to cut this.
Textures can also be 'trimmed' to a vector boundary allowing the creation of this type of finish in a background area of a job. This is a look very popular with sign makers using Vectric software.
Auto-Inlay Toolpaths
The Auto-Inlay toolpath options calculate profile cut-out and pocketing toolpaths for parts that need to be assembled to make inlays and inserts.
Tuotemerkki: Vectric
 Saat 451.8 alennuspistettä
Laskelmat perustuu Grenke-leasing hinnastoon, joka ei sisällä vakuutusta. Vakuutus on pakollinen ja asiakas voi hankkia joko oman vakuutuksen tai ottaa sen samalla sopimuksella. Leasing-rahoitus myönnetään vain yrityksille, joilla voimassa oleva Y-tunnus.
Leasingaika 12-72 kk.
Leasinghinnat alv 0.
Mahdollisuus lunastaa lopussa omaksi loppulunastushinnalla, joka näkyy tuotteen kohdalla ja yhteenvedossa. Loppulunastushinta on minimissään 70€ alv 0.
Lähetettyäsi tilauksen leasing rahoituksella, saat 1-2 päivän sisällä sähköpostissa sopimukset sähköisesti allekirjoitettavaksi.
Mikäli haluat käyttää omaa vakuutusta, leasing-yhtiö tarvitsee vakuutustodistuksen, josta käy ilmi seuraavat asiat:
Aspire on rakennettu samalle pohjalle kuin VCarve Pro jakaen saman intuitiivisen käyttöliittymän, mutta lisäämällä mahdollisuuden muuttaa 2D suunnitelmat, kuvat ja digitaaliset tuotokset tarkoiksi 3D malleiksi. Sen jälkeen antaen mahdollisuuden suunnitella 3D karkeat työstöt ja viimeistelytyöstöt.
